Sunday, June 12, 2022

And now for something completely different....

 Sorry to all those who have managed to wade through the last 10 posts. Its been a bit of a mission to get through it (on both sides of the monitor) but the info is now back up online so its not lost (till the next time).

So this  post I'm going to look at another genra entirely; Steampunk airships.

I've had an interst in this sort of thing ever since Sky galleons of Mars from the late 1980's (which still sits on the shelf in der room) and what self respecting scientist could resist a game where Victorian spaceships cruise the interplanetary ether. Later I brought a copy of David Manleys Aeronef from Wessex games and we played a few games with them at the club. Brigade models I think were in business at that point but it was hard to order them (oh and did I mention I was tight?) so we made our own. 

The first up was the british. several of the smaller ships were based on the Sky galleons models but with a few more guns. the Battleship was what I thought could be designed with a single turret and most of the guns in sponsons.

 I then came up with a Ficticious nation for my next collection. The Duchy of Burgundy was a creation of the Viena conference of 1816 being a buffer state between France and the Gemanic states. by the late 19th century it has expanded to become of a similar size to its Medieval namesake. And its got lots of airships....

first up the lighter than air ships (Dirigibles or 'Digs' for short). Burgundian airships have distictive airfoils used to change height. The battleship Dijon (missing one of the control panels) with a landing deck for scouts, escorted by a pair of battlecruisers and two lighter escort Digs. The insignia for the Duchy is a white and blue panel with the cross of Lorraine in red. The models are made from wood dowel with plastic details added. the airscrews are made by using an office holepunch to punch disks out of metal foil, then cutting and bending the blades.

Next up the heavier than aire craft. Depending on which alternative history you are using the craft are powered by Martian liftwood, R matter from ore deposits (though how it stays in the ground might be an issue) or an anti-gravity devide of some sort. The Duchys engineering was not that good and so the hulls of the aeronef needed to be bigger than other nations. The Duchys ships were designed for speed with armour and guns secondary considerations. They also had a cross section surprisingly like a pencil. The Toison d'Or class were named for the order of knights from medieval Burgundy. Initially a fast bomber design, it was found to weak and an escort version was designed on the same hull.

The smaller escort of the Sirene class initially had large winged airfoils and used speed to keep altitude. later models had better anti-grav units and used smaller airfoils. The large vessel at the front is destroyer Le Fantasque sacrifices everything else for straight out speed (rather like the WW2 class of destroyers).

During one of his periodic visits Luke Ueda-Sarson knocked up some models. The Swiss Confederation was a good choice as an enemy for the Burgundians. I can't recall any names or roles.

He also made some Dutch forces which became increasingly odd. The photo shows a mix of home defense vessels and colonial cruisers. The small vessel at the back is a city defense ship with limited mobility. At some point I intended making some similar ships suspended below balloons (the wood balls are in the box)

I'm now interested to see what the newest Osprey ruleset "castles in the Sky" is like. My initial impression is that its based around the models avaliable from Brigade models and I'm not sure if there is a points system.

Thursday, June 9, 2022

Organising a Historical refight pt 10: The New Zealand division on Crete 1941

In the final part, heres a final summary of the game from the German side along with a handful of pictures.

The Kiwi's consulting the Official history before attempting to argue a point with the game umpire. I felt I had succeeded over the 2 days when every player was annoyed with me at some point.

The German summary (again from Paul).

Summary

There was marked contrast for the Germans during each phase of the battle. The Sturm Regiment landed almost as though it was on an exercise, 3FJR was scattered over 30 square kilometres. Both took heavy casualties on landing Sturm had one battalion almost wiped out, 3FJR lost 25% spread over all battalions. The Sturm Regiment had to fight hard to gain its objectives including much hand to hand fighting, 3FJR met with early success using its superior fire power and effective support from the Stukas. Both then consolidated their positions. The Kiwis rightly concentrated their counter attack on Maleme so 3FJR had an easier, but still difficult night. 3FJR's renewed attack in the morning met with success against a position that had had troops withdrawn. Sturm was forced to launch a hurried counter attack with the Mountain battalion through a number of enemy battalions. In the end the Germans made two mistakes; either of which could have turned the battle.

I was, with Rob's agreement, too conservative, I should have accepted the risk and moved VII Battalion onto the coast road. 20 Battalion that captured the airfield and held it would have either been caught in its trucks or forced to launch an attack earlier in the night and would have arrived late or not at all.

Rob was, with my agreement, too ambitious. He should not have sent the Mountain battalion up to ??. The idea of out flanking the Kiwi position was a good one but given that they wouldn't be in position to launch their attack before dusk was not viable for the first day. If the Mountain battalion had dug in as a last ditch defence on the airfield then 20 Battalion would have been repulsed and a counter attack in the morning would very likely have recaptured the lost ground.

And 2 final pictures to finish up with.

Paul (3 FJR) and Richard (10 brigade and hangers on) were the opposing commanders at Galatas. While not looking too impressed with it all, Richard had managed to fight the Germans to a draw here.


Rob (Sturm regiment and Airlanding troops) and Larry, Curly and Mo Peter, Ant and Russell pointing out the suceessful counter attack at Maleme late Sunday afternoon.

And thats it (after a marathon 10 parts). The one thing that you want after 5 months work is for The game to work and provide a different experience for the players beyond the standard 4-5 hr afternoon or evening game.In retrospect I was very lucky in that the planning and choices I made worked out OK in. The small size of the forces (2 brigades per side) meant that things kept ticking along at a good rate (with me pushing a bit when I thought the game was drifting). A simple ruleset is essential when you have a group of players with varying levels of experience and Spearhead (for all its percieved faults) is that to a tee. It also means that there is no excesive hunting through the rulebook looking for some special rule that only one player remembered. The ready avaliability of the NZ oficial histories was a huge bonus.

The real pity/best thing (take your pick) was that we only played the scenario once. Honestly I don't think it would work again as the Germans had a far better idea of how to not losea after one play through. The boards were stored at the club and after a few months the hills were taken off and they were used as normal tables for many years.

And having been involved with a few scenario games over the years, my actually preference is for pickup points games as I don't have to spend weeks/months doing the research....

(Oh, and we wone best demonstration game that year beating out several 28mm refights)

Wednesday, June 8, 2022

Organising a Historical refight pt 9: The New Zealand division on Crete 1941

 In this post we have a similar report from the other side of the fence; the regimental commander of 3 FJR.

First Morning

The regiment was wound up, everyone was looking forward to landing on Crete and more importantly getting out of the valley and onto Signal Hill. Take off went well. In the early light I could see the streams of Ju-52s rushing down the runway and labouring into the air. Forming up took longer than I had hoped but at last we were in formation and heading south. I went forward and checked with the pilot, he was tense, there was a lot of scattered cloud about and keeping formation was difficult. As I returned to my seat I could see that our tidy formation was already starting to spread out and break up. With a sense of foreboding I studied my maps for the hundredth time.

I was stirred from my study of the map by the warning that we were approaching the Cretan coast. As I move to my jump position I was horrified to see parachutes opening over Galatas. Some of my troops were landing over 2km north of their drop zone. (One of the few survivors of that gallant platoon made it back to our lines late that evening; he told a tale of chaos, troops landing amidst buildings, on roofs, desperately trying to reform. A very rapid counter attack was mounted by infantry and what appeared to be a scratch force of headquarters troops, led by two senior British officers.) Green light, time to jump, hoping like hell that the pilot had some idea where we are. There off to the north is the prison, it should be to the east but we were less that 1km off target. I hit the ground hard and rapidly gathered my gear, no sign of the regimental defence platoon so I join up with a nearby platoon of II Battalion and headed rapidly for our drop zone. We pass troops form all four battalions all rapidly heading for their respective drop zones, trying to form order out of chaos. Reports started to come in, II Battalion was dropped mildly scattered, the three remaining battalions are spread up to 2.5km from their drop zones.

Major Heilmann, of III Battalion, was killed organising a defence by platoons of at least three battalions against a strong attack by a Greek battalion east of the prison. Without the Me-109s strafing the attack as it came in the situation would have been much worse. This attack beaten off, the forming up proceeded reasonably smoothly. I took command of III Battalion in place of Major Heilmann as I was planning to accompany it. There was no contact with Generalmajor Sussmann, he appears not to have landed on Crete at all. Major Liebach of the VII Pioneer Battalion was very late arriving at his drop zone as he landed in an olive tree and had to be cut down.

The drop I saw over Galatas was unfortunately not an isolated instance. A number of platoons had fallen wide, those that landed to the south and west had a long march to their drop zones but were otherwise OK, except for the unfortunate platoon that ended up in the Reservoir. Those troops who landed east or north east of their drop zones appear to have landed amongst enemy troops and will have been lucky to survive. Over 25% casualties on landing but we have survived the initial counter attack. It is clear that there is more opposition than intelligence warned us of. Several platoons that were scattered onto Signal Hill have made it successfully down to their drop zone and the way north still appeared clear.

As the majority of each battalion reached it drop zone I and III Battalions push north according to plan. II Battalion forms a defensive line to the east of the Prison guarding against further attack from the Greeks. VII Pioneer Battalion formed up as reserve while waiting for its commander to be cut down from his tree. As I moved up with III Battalion to take the northern slopes of Signal hill I could clearly see the Stukas diving down on Wheat Hill in support of I Battalions attack. As the Stukas wheeled away and another Gruppe concentrated on Ruin Hill the lead company of I Battalion was seen occupying their first objective, Wheat Hill. I moved on with III Battalion and we successfully occupied the northern slopes of Signal Hill, covering the left flank of I Battalion and covering the coast road with fire.

First Afternoon

Reports came in of I Battalion successfully pushing onto Ruin Hill. The Stukas were now concentrating on Galatas. The enemy fire from around Cemetery Hill was very hot  causing some casualties. With an unknown number of enemy troops in Galatas and I Battalion having suffered over 50% casualties I decided it was time to shorten the line. I Battalion was ordered to withdraw back to Wheat Hill and II Battalion come up from valley and extend the line around the eastern slopes of Signal Hill. VII Battalion was also ordered off the valley floor to a covering position to the west of I and II Battalions. It is fortunate that they were as they stumbled upon a company of Kiwi's lurking in our rear which they rapidly forced to flee. There was much jubilation when reports came in of the capture of Maleme Airfield and the imminent arrival of Mountain troops. We weren't sure what was between us and our reinforcements but were sure we could at least hold out until they arrived. My aim was to continue to tie down as many enemy forces as possible while attempting to avoid further casualties. The situation appeared to have stabilised and during the late afternoon I took the opportunity of reorganising our defenses before digging in for the night. III Battalion shuffled right to better support the much weakened I Battalion (down to the equivalent of 7 platoons). VII Battalion was moved to the northern slope of Signal Hill to replace elements of III Battalion and guard our western flank from forces driven back from Maleme. II Battalion moved a company over to replace VII Battalion covering our position from the south and south west, where I expected little if any threat.

Not long after VII Battalion arrived a weak Kiwi company was sighted moving east along the coast road. The battalion engaged with machine guns and was unable to attract any support from the Stukas that were concentrating on Galatas. This in retrospect was a missed opportunity. Major Liebach should have been more forceful and moved part of his battalion down onto the coastal plain to destroy this force rather than letting them slip away along the beach, just out of range of his machine guns. When I received his report on events it was too late, they had escaped. I further compounded Major Liebach's error by failing to fully understand the significance of the coast road. I was worried about the inevitable counter attack the Kiwi's would launch sometime during the night. I knew that all of my battalions had taken significant casualties and were stretched thin. I hoped that my continued presence and Kiwi concern about my renewed attacks tomorrow would stop significant re-inforcements moving from my sector to Maleme. As later events proved I was wrong. What I should have done, in hindsight, was move VII down onto the costal plain, risking an immediate counter attack. Withdrawn the weakened I Battalion from Wheat Hill to replace VII Battalion as our western flank guard. III Battalion could have then moved two companies east to replace I Battalion on Wheat Hill. II Battalion could have withdrawn slightly further north replacing I Battalion south of Wheat Hill. Whether we could have completed this significant reorganisation and completed digging in before the expected Kiwi night attack was dubious.

First Night

Having dug in where we were we waited expectantly through the night. By midnight we were beginning to wonder if the Kiwis had decided to await our attack in the morning, perhaps concentrating their efforts around Maleme. I was beginning to rue my decision not to push VII Battalion onto the plain. Suddenly at about 0230 the Kiwis and Greeks were swarming over our positions. A massive bayonet charge by at least two Kiwi and one Greek battalion was coming in from the east and south. I Battalion was broken, but fortunately limited counter attacks by III & II Battalion restored situation. I committed VII Battalion to fill the gap and prepare for its attack in the morning.

Second Morning

At first light I Battalion having rallied attacked and recaptured Ruin Hill. II Battalion attacked Pink Hill supported by VII Battalion and limited Stuka attacks. The enemy was successfully driven back and heavy casualties were inflicted on enemy troops attempting to form a blocking position south east of Galatas. Reports come through that the airfield at Maleme has been lost over night. The Sturm Regiment  had withstood massive attacks from the battalions it had been battling all day. It was finally overcome by a fresh battalion, that had been trucked down the coast road from the Galatas area, supported by tanks.  The Mountain battalion that had landed on the airfield during the afternoon launched a hasty counter attack south from ?? where it had moved ready for an attack to the east. It had good success early on but arrived at the airfield too late. The Kiwi battalion had consolidated and dug in. They inflicted heavy casualties on the Kiwis but were unable to dislodge them from the airfield. The drops on Heraklion and Retimo yesterday afternoon were a complete debacle and without Maleme we were cut off with supplies dwindling.

(This report supplied by Paul who commanded 3 FJR around Galatas)

Tuesday, June 7, 2022

Organising a Historical refight pt 8: The New Zealand division on Crete 1941

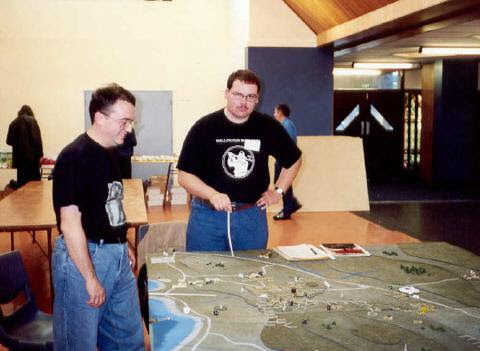
The next couple of posts sees me taking a back seat and letting the players share their thoughts on the game. Unfortunately I didn't take many photos so you will just have to enjoy the first hand accounts.

Retaking Maleme

(aka, “They don’t like it Upham” by sergeant Bill May on Maleme airfield, 21 May)

Yesterday morning, 20 May 1941, at the start of the German invasion of Crete, 20th (South Island) Battalion was posted north of Galatas guarding the approaches to Suda bay and acting as divisional reserve. From first light we could see the Jerry paratroop planes and Stukas to the south giving our guys a hammering but we saw no action ourselves. Boys chaffing to get stuck in.

In the early afternoon the word came through that ‘Kip’ (Brigade commander Colonel Howard Kippenberger) wanted us to hook from the North and clear the paratroopers, off Red Hill overlooking Galatas. They’d given our Composite battalion a pasting.

We moved off cautiously using the vineyards to keep out of the sight of the Stukas and Messerschmitts. Sky was thick with them and we were slowed down a good deal.

Some time before 1500 we reached our start line and were told to halt and form a defensive position. Seems the top brass now thought the Germans had the hills to west of Galatas too thickly manned for a daylight op and we’d hit em instead after dark.

Around dusk the word came in that ‘Kip’ had arrived and there was some sort of conflab going on between our divisional commanders about some big push. They said Hargest had driven all the way from Maleme in a Bren carrier.

As night fell we got new orders. We were to prepare for immediate replacement of our position by an Aussi battalion and take their trucks and drive down and storm Maleme airfield during the night while Herman’s air boys were having their beauty sleep. We’d given the Germans a stern check in the morning. The whole world was watching. The key to the defense of the island was Maleme airfield to prevent Jerry bringing in reinforcements. Our chaps defending across their had been blasted off the field by the Luftwaffe and the airborn infantry and it needed retaking.

Galatas could be left in the capable hands of the the 18th and 19th and the doughty Composite Battalion and Greek fellows.

10pm. No sign of the Aussies. C’mon Aussi, c’mon, c’mon. Time to traverse the island and put in the attack while the skies were empty was running through our fingers.

11:00pm. Still no diggers or trucks.

11:30pm the Aussies arrive. We rapidly take over their trucks and get on our way.

‘Kip’ takes personal command over from Burrows. In support we have two troops of light tanks from the RTR and a couple of platoons of NZ Div Cav acting as infantry who have already survived several scrapes with the German paratroopers and Stukas during the day. We were glad of their support.

By 1:00am we are passing through the positions of 28 Maori Battalion at Palatanias guarding against a seaward assault. They cheer us on.

At 2:00am we disembark on the start line more than a mile east of Meleme village, our first objective.

As we are doing this we see the sky to the south west filled with tracer. We’re told its our 19th Engineers attacking point 107. Go the Sappers. If they can clear that our job will be so much easier. We hear later they broke through as far as the airfield but took tremendous losses which forced them to withdraw before dawn.

Four hours till sun rise. Precious little time to get our job done. We head off through the fields and vineyards towards the village. It’s a silent approach. No arty to shoot us in any way. Boys all keyed up.

Suddenly we are there. We attack on a two company front with D (Otago Southland) Coy on the left and B (Nelson/Marlborough) Coy on the right, each supported by a tank troop.

The Germans have machine gun nests and a captured Bofors screening the village. The Southern men are thrown back and their tank troop destroyed but B Coy with the help of Div Cav clear the spandaus and the Bofors they are facing.

My platoon under Captain Charlie Upham and   the rest of C (Westcoast) company attack through D company and storm the MG’s, acquiring many of these fine weapons and wreaking havoc on their former owners.

Meanwhile B company and Div Cav storm the northern end of the village and, after a vicious hand to hand fight with some grave losses, chase the Germans out.

In C company do the same to the southern end of the village. The Germans fall back trying to reform on the airfield. Upham’s leads our platoon and our remaining Tank troop are after them like a Terrier on a possum inflicting losses and giving them no respite.

Then we are all surging through on to the airfield shooting more Germans.

The paratroopers attempt a desperate stand mid airfield. Their fire is withering but there’s no stopping our guys with their blood up. We smash into them, shooting, grenading and cold steel. They break and run again.

But now dawn is almost on us and soon the fighters and dive bombers will be back. We’ve taken perhaps 25% casualties at this time but the boys are full of fight. ‘Kip’ pulls most of our mob back to start digging the slitties that we’ll soon desperately need.

The Tankies get sent to the far end of the field to make sure the dispirted Jerries stay at a respectable distance.

C Company, having killed all the Germans we could catch get a new job to clear any Germans off point 107 which over looks the airfield and link up with 19 Engineers if we can find them.

Off goes Charlie urging us to keep up.

We run into entrenched partroopers on the crest. It’s a fierce fight and many of our chaps go down. But the paratoopers are getting it as well.

The sun is now up and the planes can only be minutes away. Suddenly we on 107 see a new threat. To the south are Germans coming towards us in batallion strength. Tough Austrian mountain troops. Too numerous for a depleted rifle company to hold. The Alpine boys bite hard and C company lose about another platoon as we fall back on the main body on the airfield, taking a wounded but defiantly swearing Upham with us.

As the morning mist clears our tank comes under fire from an antitank gun west of the airfield. Fortunately they’re still tizzed up from being chased for a mile by bloodthirsty Kiwis and they miss. The Tank discretely retires back out of range to the main body.

Suddenly we hear the throb of aero engines and the fighters appear followed half an hour later by the ugly, bent wing butcher birds. Our trenches look frightfully shallow and close together. The boys peer skyward, licking their lips, anticipating a long hot day.

Then ‘Kip’ plays his trump card. In the middle of our position he spreads out a German Air recognition signal. He perked it clearing out a landing in Galatas yesterday morning.

The Stukas waggle their wings and search for other prey. They soon find it in the form of D company men who are marching to rejoin us having been dispersed during last night’s action. For a while they ride their luck.

From Point 107 we see the slopes start to fill with mountain men. We fire fitfully but they use the ground well. Our rifles seem inadequate against their spandaus. We lob a few mortar bombs their way. It slows them a little. They look confident. They have all day.

We have taken about 50% casualties now. We have no support in sight.

We know there are more Kiwis near at hand. Help must come soon.

The boys moral remains high. We’re determined to sell this ground dearly. And while we do there will be no planes landing at Maleme….

( Thanks to Richard for this well written acount. In his day job he was/is a history teacher)

Monday, June 6, 2022

Organising a Historical refight pt 7: The New Zealand division on Crete 1941

Right, after all the setup discussions its time to get to the actual refight. 

One of the issues with a historical refight is that the players know whats suposed to happen and the final outcome. I'll admit now that my mind is a bit of a blank on how I forced the Kiwis to set up reasonably historically. I think that the German battalions picked their target landing points and then the Kiwis deployed.

The Kiiws deployed in 2 zones. The first on the coast from Maleme to Platanias.

The actual dployment was (Map from the NZ official history) .

The deployment on the table was fairly similar.

I don't have an orginal map for the Galatas area but the Deployment looked like this. The prison is at the ar left and Galatas is the large town in the center.

So, everything is ready for the kickoff and its time for the German troops to make their appearance.

Parachute attacks in wargaming are always hard to execute and I've read of may ways to do it. some even involve dropping bits of paper from a certain height along the flight path to see where the stands land (thank you WRG, at least you went onto better things with the DBX series).

I came up with the following system.

German paratroops must dice on landing. Each battalion designates a drop aim point on the table and throws a d6.
            -1 way off target. 2D6 x2 inches. diced by platoon.
            -2 off target 2D6 inches. dice by platoon.
            -3-4 off target. 2D6 inches dice by company.
            -5-6 on target 1D6 inches dice by company
Direction is found by placing the 2 dice in a cup and inverting on the table. One die is predesignated as the center, and a line is them drawn through both dice to give the direction. Add the die scores indicated above to determine the distance from the drop aim point. Companys are arranged around this point. Platoons may be deployed facing any way the player wishes.

I also think that there may have been a -1 to the DEF of the german stands on the turn they landed to similate the beating that they took from the Kiwis.

So, how did it play out on the table.

At Maleme the Sturm regiment executed a perfect drop with the Glider battalion in the hilles behind the Airfielf and the rest of the regiment across the Tavonitis river. They formed up and were quickly into their work.

At Galatas the 3rd FJR were not so lucky. A spectacularly bad set of dice rolls resulted in the regiment scattered to the 4 winds.

Surprisingly enough this is very close to the historical result.

And how did it play out? Find out the result in the next part of the increasingly long series.


Sunday, June 5, 2022

Organising a Historical refight pt 6 : The New Zealand division on Crete 1941

In this post I'm going to discuss the rulles modifications that I made along with any comments I have about the changes. As its been 20 years there may/will be a few blank spots.

There were some rules modifications that I needed to make for the parachute drop at the start of the game. I went with a dice based system and I'll cover it in the next post on the actual game as it fits better in that story.

Each turn the German regiment commanders roll for close air support.

1 Nothing
2-3 1 stuka
4-5 2 stukas
6 3 stukas
-Germans may also call in a level bomber attack, but only against a town sector. Roll 4+ ( +1 on first day) and takes 4 turns to arrive. Attacks as per rules. Air attacks use the standard D10 and factors rather than the book method. Stukas and heavy bombers are armed with bombs only, and the bombing template is used.

The first bit makes perfect sense but I can't quite remember what the D10 story was. We did do a fair bit of experimenting with D10 but found that any percieved gains were rather illusionary and went back to D6. Now the next one has me a bit confused.

-Units that are within 18 inches of a fighter have their movement slowed. They may move faster, but are then attacked as normal ( any element moving in the zone is attacked. Not limited by the number of planes in the area.)

Now I can see what I was intending and it did have the desired effect on the tabletop but I can't remember how the fighters were alocated. Possibly each German commander got 1 per turn? 

Next up, modifications to the main rules.

-Players may organise attacks by companies only. These are given combat arrows and objectives as battalions. However, if they take casualties they must then pass a moral test. Failure results in 2 turns retreat back along the attack arrow that was drawn.
-Companies may be deployed in defence out of command radius of their parent BHQ. However, the company then counts as lost towards the battalion break point untill it returns to the command radius.

One of the weaknesses of Spearhead is that the company has no roll in the game (appart from attaching divisional assets). This at least gave them a use.

-German and NZ support units ( mortars, regimental guns) may either fire in the indirect phase, or may add 1 to any attack in the direct fire phase.

Again another option for battalion level assets. Personally I think that battalion suports that are 2-3 guns at battalion level should be used to add one to a combat in range instead of being combined at regimental level.

-German Troops who are counted as veteran do not gain a +1 in close combat. New Zealand troops in close combat gain +1. Other Allied units gain a +1 if they initiated the close combat.

The alies were short on ammunition and were more keen to engage in close combat. The Greeks only have a Def and AI of 4 but gain the +1 if they attack into close combat. This means they are brittle but keen which is backed up by the historical accounts. However they could only get an order change on a 6 and so were limited to attacking German stands that they could see.

-At nightfall, German units may withdraw into night positions. They may not move again until morning unless attacked. Dawn is 6am-7am, and Dusk 8pm-9pm. NZ troops moving at night may close assault platoons that they could not see at the start of the move, but must have started within 300M. Night vision is 100M.

The Germans were really not keen to wander around at night. The moving into close assault whichout seeing the target replicates the attack by 20 Battalion on the night of the 22nd of May towards Maleme airfield. if played the normal way the distance to cover would have been impossible (which is a factor that a surprising number of scenario writers for any rule set often fail to grasp).

NZ troops who destroy german elements in close combat, or within 100M of their position roll a D6.
1 No result
2-4 1 rounds fire at +1 ( captured weapons)
5    2 rounds fire at +1
6 capture air recognition flags. Element treated as german by german airforce. No penalties for movement etc.

My dim recollection is that the allied battalions had limited amunition (x turns) and any turn that more than Y stands in the battilion fired expended a turn of fire. Thus there was the chance to pick up and use German weapons (which the Kiwi's excelled at throughout the war). The air recognition flags were something that popped into my head as an interesting idea and becaame very important on the Sunday afternoon as we shall see...

Saturday, June 4, 2022

Organising a Historical refight pt 5 : The New Zealand division on Crete 1941

One of the big problems that I faced was how to make 28 town sectors on a small budget. There were no 3D printers back in the dark ages. Fortunately I had previous experience resin casting for model railways. The first job was to make some masters for a small selection of houses. I looked at some period photo's and tried to capture the look of greek village buildings. All the town sectors were made up using these 4 models.


They are scaled slightly smaller than 6mm scale but still look OK on the table. The masters were made from a heat set clay called FIMO, but any similar product will do.  Create a basic structure, let it set, and then add the details one at a time. I was surprised how easy it was. 

The next step is to make a mould to cast from. This is simpler than it sounds. 

Normally I would buy a tin of Silicone castingrubber but that's a bit out of the price range of this project. Instead I used a tube of Silicone Calking rubber, used world wide as a bathroom sealant. Coat the master with a thin coat of petroleum jelly ( Vaseline) so that it will come out of the mould at the end( you can see on the master that I didn't do this, and tore the mould on the way out). Then put a layer of Silicone rubber over the master, trying not to get any air holes next to the masters surface, and leave to set. it just needs to cover the model. when set add another layer until you build up the thickness of the mould to about 5-7mm thick.

Now, with our small budget, there is only 1 casting material to use. I chose Plaster as it didn't have to last too long and would be reasonably tough. Just mix it up and use a small screwdriver to get it into all the corners of the mould. then carefully demould it when it is set.

A little work to clean them up ( these were from later in the casting process and the moulds had had a bit of wear by that stage) and they are all ready to paint and base  And here is the result. a quick paint job and some scenic effects and its all done.

In the end quite simple and they did look good on the table which is the most important thing. And the total cost? For 28 town sectors I think about $30NZ, which is $15US at the moment. Compared to what I was looking at paying commercially for each house there was no other way I could have done it. 

The figures for all the units were purchased from Heroics and Ros. The British were from BR01 infantry  and BR02 support weapons. The handfull of other stands were from the standard range. Likewise the German paratroops were GR03 paratroops and support weapons. The mountain troops were GR08 panzergrenadiers for the action poses.

The handfull of special stands.

Matilda II from 7 RTR. There were only 2 tanks as part of the defence of Maleme airfield but they are an important part of the story so get a stand.

Mk VIB light tank. 2 stands present from C sqn, 3rd Hussars

A battery of Bofors 40mm AA from 7 LAA was present on Maleme airfield. These lucky chaps have a sandbagged gunpit, though I should have added lots of spent brass and other detris.
The British figures were recycled and went on to fight in Normandy and Market Garden and many other skirmishes, while the German paras have fought successfully in many battles since (often against horrible odds with little support), but have never again been required to jump out of a plane again.

Wednesday, June 1, 2022

Organising a Historical refight pt 4 : The New Zealand division on Crete 1941

 So with both sides sorted, its  time to look at the making of the game boards.

This started a year before when a floor of offices in the Victoria University School of Chemical and Physical Sciences was being renovated. The carpet can only be described as being designed in the 1980's by a wargamer who wanted basecloth replacements and was butt ugly when in situe. I scored as much as I could as it went out over the loading bay. It remained rolled up in my office for a few months.

The NZ offical history supplied a map which I then used to create the base terrain including all the contours. 

The map scaled very close to a table size of 16' by 6' (so 4 tables each 6' by 4'). All work was done in a corridor at Universty outside the undergraduate lab I was in charge of over several weekends. The 4 bases were cut to size (6' by 4') and then the layers were built up. I started with the Maleme end and once that was complete I moved to the one next to it. I also painted on the roads, rivers and sea using housepaint testpots. At this point none of the layers were stuck together and everything was rolled up at the end of the sessions.

On the Friday night before the 2 day convention Paul Reynolds and I set up the tables. The rolled up sections were rolled out and all the layers were gun-stapled in place. A few things were touched up and the town sectors were placed, along with all the placename tags. Paul then applied some small finishing touches with some more painting and some scatter material which really set things off.

When finished the boards looked like this. The picture was taken first thing Saturday morning with the trrops about to be set up. Maleme airfield is front left with point 107 just to the right. The white spot at the center rear is the Prison in the middle of Prison valley with Galatas just to the left. The uneven wear on the different parts of the carpet worked really well defining the contours far better than an overlying cover cloth. The battlefield was a scale 7km x 19km.

At the front right is the 4 page historical background I wrote to set the scene for passing gamers (we were in a larger hall and there were about 150 people playing in competitions) and the clock to keep track of the in game time.