Showing posts with label German 1944. Show all posts

Sunday, September 6, 2020

The Luftwaffe done

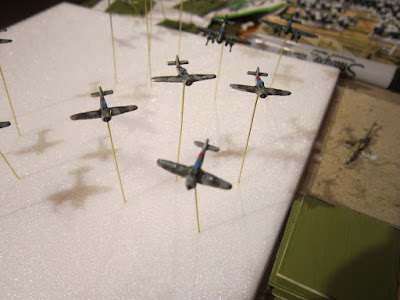
 A change from Napoleonics this weekend as I got the soldering iron out and based the SH German air support. First up, the FW190's. Again 4 on a base which is easier when the models are so small.


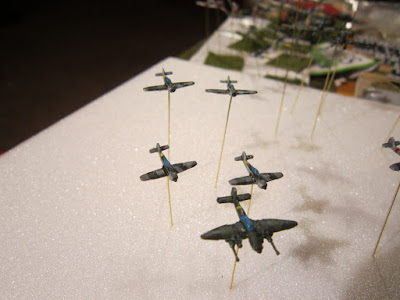
Cannon armed Stukas, only 2 to a stand this time round.

So why not mix the 2. And if 4 is good, surely 5 is better. Rudel makes an appearence with his backup band.

Finally I had a crack at mounting the basic Stuka's in some imitation of a dive bombing attack formation.


I'm not sure about this but given the limits of the base size it will have to do.

I also had a near first when I dropped an FW-190 under the modeling table. Its the first time I've thought that I have lost a model in quite a long time and it took a hard 10 minute search to find it.

Friday, August 21, 2020

Friday night

 I'm going to start doing a friday-ish night update ofwhat I've been working on for the week. So without further ado let the slideshow begin.

Carrying on with the air support replacement project I've been painting Germans this week.

FW 190's
FW190's. I never realised they were so small.

A collection of Stukas
A wargaming cliche

The last photo comes from a story in "Stuka Pilot". Rudel writes that when his wing was re-equiped with FW190's they continued to fly cannon armed Stukas as well, though frequenty he was the only one flying them.

I have to sit down this weekend and do some soldering.

I aso finished up one of the P47 stands.

Makes a bit more sense now

I like the look though I'm not sure a large radial engine would toss out so much smoke. Now a delicate little P51......

The Imperial guard grenadiers got a flock and some flags.

I was having an e-mail chat with Mr Page this afternoon (slow Friday at work where I had several things to do, but not the kit or time to do them at the end of the week). He commeneted that next years project was rebasing his MSH stuff on 2mm laser cut MDF. For a moment I thought "wow that would be nice", then the pratical side of the brain pointed out just how many stands that might be. Initially the count was "lots" but then I wondered just how many stands it was. A quick guess was 1500 for both SH and MSH. 

After tea tonight I went into the room and had a quick approximate tally up and came up with a number of 2000 stands. And I was about to add that here when I remembered I had missed a box entirely.

2700.......

Monday, August 10, 2020

More air support

 As part of my ongoing saga in replacing my SH and MSH air support I was having an e-mail discussion with Peter a coule of monts back. He was interested in buying some more 3mm aircraft (there is a bag of similar models in the Page strategic lead pile) but was not sure about buying packs of 8. My imediate reply was "so what are you interetsed in...". It turns out that great minds think alike and fools seldom differ (take your pick).

The offshoot was another order from Picoarmour. Again when it arrived I pondered the decontamination procedures and then remembered it had been in the post for nearly 4 weeks. I''ll split it into 2 posts with the first up being German air support. Now by late war this is rather optimistic but doesn't stop anyone collecting models does it.

So from left to right we have HS129's, Ju87G's, Ju87B's and some FW190D's. Again I.'m really impressed with the casting (the Stukas with 37mm are very nicely done) and I'm looking forward to painting them.

Monday, February 6, 2017

Back at the bench

Confession time.

I have not done that much painting in the last 12 months. This has been down to the slow deterioration of my eyesight. Fortunately I'm going towards the longsighted end of the spectrum, so I'm fine functioning in everyday life. the problem arrives when I'm trying to look at things up close....like 6mm figures. Its not too bad painting the AFV's (unless tires are involved) but the men have been a real struggle.
Now I've been trying to avoid accepting this for a while ( I'm Peter Pan dammit!), but last weekend I finally went into the Red Shed optometrist and after a couple of minutes came away with a solution of sorts.


I've been told that they make me look smarter (maybe I should wear them at work).They can be used as bifocals if you push them to the end of your nose, providing hours of hilarity for the lady of the house.

The result is that I finished a battalion of Panzer Grenadiers with supports. For a bit of variety I've modeled the 21st panzer division in 1944. This division was equipped with conversions from captured French chassis. The Half track is the Le SPW 304(f). I've used the H&R GR08 Panzergrenadiers, cutting the standing figures off to fit in the back of the half tracks.


 Well, apart from the BHQ which is a Sd Kfz 251/3 C model. It should be the later simplified D model but this came out of 'Der Box'. The stand still needs another vehicle


The support weapons are also on French chassis. From left to right they are; a baby neblewerfer, a Pak40 on a half track and a 20 SP mm AA unit.


Models are all H&R ex Armstrong models. I still have some other models to finish for the divisional AT units.

Tuesday, June 26, 2012

German Panzer Grenadiers 1944 (Part 3)

Submitted by TWR

In my third post on a sample 1944 Panzer Grenadier Defend List I will cover off some Option B lists. As I have mentioned before an Option B can comprise up to 100 points of troops in 1944. However, before starting to select troops lets review the situations that the Scenario Generation System allows us to use an Option B in.

Firstly you can't elect to use an Option B List when defending against an enemy Hasty Attack or Deliberate Attack. In these situations you can only select an Option A. However, if your opponent has opted to conduct a Deliberate Attack you can declare you wish to conduct a Spoiling Attack. In this situation you immediately have reversed the tactical situation and become the attacker. This models the situation that while the nominal attacker is working out his fire plans, moving troops forward to start lines for his main effort, you have been ordered to disrupt him by launching a spoiling attack. Now, the good news is that in a Spoiling Attack you receive an Option B list without suffering any victory point penalty. Therefore every defend list needs to have an Option B list! The rules around Spoiling Attacks can be found in sections 5.1 and 5.1.3 of the Scenario Generation System.


In addition in fluid operational situations you may also be required to use a Defend List. Here you are considered to be conducting limited offensive operations and not always with pursuit or breakthrough formations. In wargame terms these are of course encounter battles. In these situations you can use either an Option A or B, but in each you suffer a victory point penalty. The rules are covered under section 5.2 of the Scenario Generation System.

Therefore, an Option B in a defend list list is always going to be used in offensive situations and as such we should customise the list for that purpose.

You may recall our original Defend List had three motorised Panzer Grenadier battalions, all on foot, one of which was understrength. The list also had two Stug Companies, from the divisional Panzer Battalion, as well as limited artillery and flak support. So let see what we can add to transform the Defend List into one that can conduct limited offensive operations.

Option B - List 1:

This option is designed to increase the number of Stugs, taking them to three companies and increasing the artillery support. While the Stugs can't be massed into a Panzer Battalion, as we have no HQ, one motorised Panzer Grenadier battalion can have two Stug companies and another one a single company. This provides a greater level of combined arms. On the artillery front I'll supplement the 105mm artillery with some heavy hitting 150mm artillery. One option would be to take Werfers but the 150mm guns can fire every turn and be more likely on target, something the Werfers can't always achieve. Using this criteria my first Option B list is as follows:

Elements from Panzer Battalion:
1 x Tank Company: 2 x Stug IIIG L/48 each at 21pts

Medium Artillery Battalion:
3 x 150/30mm Howitzers & trucks @12pts each
1 x FAO @ 10pts

The Stugs when modified by German regulars come to 50 points while the artillery, also Greman regulars but with only the FAO on-table, come to 48 points. With two points remaining I will purchase some additional entrenchments as they can be used in an "Advance to Contact" scenario, refer section 5.2.1 of the Scenario System. However, a reminder about Stugs. They cannot move and fire, therefore your attack planning needs to consider this carefully.

Option B - List 2:

The second option is included as an illustration of how you can add variety while using options. We all know that players are very nervous about Tigers so a Tiger company seems an ideal option to focus your opponent's thinking. Tigers in 1944 should be rated as veterans so you will consume your points allocation quickly.

Elements from Heavy Panzer Company:
2 x Tiger I @ 27pts each

The base points for a weak two stand Tiger company is only 54 points. However, when it is multiplied by the German veteran modifier of 1.4 these two stands become 76 points. This leaves only 24 points which isn't even enough for a weak Werfer battalion! However, buried in the lists are some other indirect fire options.

Firstly, you may recall that our third motorised Panzer Grenadier battalion was understrength and did not have its 120mm mortar. We can add this and increase the indirect fire component of the battalion. Further, each Panzer Grenadier Regimental HQ has the option of a single 150mm Infantry Gun.

Additional reinforcements Motorised Battalion 3:
1 x 120mm mortar and truck @ 6pts

Elements from Panzer-Grenadier Regimental Assets:
1 x 150mm SIG 33 & truck @ 12pts

Applying the modifiers these stands come to 24 points which means this Option B sits perfectly at 100 points. If you don't like the additional mortars and infantry gun consider adding some additional flak instead. 

Option B - List 3:

The final option draws in aspects of several sublists to provide both additional Stugs, some additional artillery support and some additional anti-aircraft. In some ways it is even more balanced than the other options as it bolsters capabilities in all these areas.

Elements from Panzer Battalion:
1 x Tank Company: 2 x Stug IIIG L/48 each at 21pts

Nebelwarfer Battalion:
2 x Nebelwarfer and truck @ 7pts each
1 x FAO @ 10pts

Divisional Light AA Battery:
2 x Light AA Battery: Flakvierling (Quad 20mm) @ 9pts each

As before the understrength Nebelwerfers are, excluding the observer, off table. As a result the final costings of all the above come to 98 points. To which we can add two entrenchments for good measure, which we may or may not get to use depending on the scenario.

Again, we are at the absolute limit of attachments across our three Panzer Grenadier battalions so care must be made when attaching companies. I would typically see the 3rd Panzer Grenadier Battalion, which you may recall was the weak battalion, with two companies of Stugs and the divisional flakvierling. One of the other battalions would have a Stug company with anti-aircraft cover provided by the Panzer Grenadier Regimental 20mm flak platoon as well as the Panzer Battalion flak platoon, with each platoon counting as a company for attachment purposes.

Tactical Considerations:

The next question is how do you use the defend list. Well, firstly you have paid a 20% premium for being German, compared to your American and British opponent. This premium is for your command and control. I encourage you to use this by operating a flexible defence. By this I mean be prepared to move your battalions around. You have three battalions and there is a good chance one is not going to be engaged. This battalion is your designated reserve and while it may hold a portion of the line it can move to reinforce other battalions. However, if the enemy axis of advance is different than you expected any other battalion can become your reserve. Be prepared to move this reserve to a decisive point of the battlefield.

Within battalion defence positions consider carefully the likely enemy routes of attack. Position the elements of your battalion to cover these positions. I usually try and establish company sized defences but always hold a small battalion reserve. This is not deployed to far forward and can realign reasonably quickly to positions that are likely to become threatened. Pivoting stands takes time, so being held back speeds the introduction of the battalion reserve to the line. Use terrain to conceal and protect your troops. A wood line will greatly reduce casualties as will entrenchments. However, both can be abandoned and should be if the situation warrants it. Further, ensure you are achieving the first fires from stationary positions.

Consider carefully your use of supporting troops. If your opponent has invested heavily in counter-battery assets engaing with artillery too soon can expose your limited artillery assets to devastating artillery fires. Sometimes it is more effective to retain your artillery fire so it can be combined with direct small arms fire. Likewise your Stugs can be useful in engaging infantry, as well as the enemy armour. All the Stugs are support stands so can fire through the fighting stands of the battalion they are allocated to support. But don't forget they are not tanks, they must be stationary to fire and can not be hull down. Further, remember the allies rule the air, keep your Stugs well protected from enemy aircraft by the careful positioning of anti-aircraft in defence and when on the move.

Finally, if you are likely to be subjected to a deliberate attack consider conducting a spoiling attack. Again, you have paid additional points for being German. A spoiling attack can sometimes catch your opponent by surprise and makes use of the increased command and control capability of your Germans, but before you decide this consider carefully the terrain.

That completes my series first series of articles on one possible Panzer Grenadier Defend list. I hope you have found this exercise of interest. You can also download the complete list with all options included. The file, formatted as a pdf, can be found here.

Now just to wrap this first series of articles here is a link to get you in the mood. Step back to Normandy and 1944 and gather your forces to halt the Americans and British.


Good luck planning your own lists, I'm sure you can do better and if not, remember variety is the spice of WWII wargaming...

Thursday, June 21, 2012

German Panzer Grenadiers 1944 (Part 2)

Submitted by TWR

In my last post I provided a sample Defend List based around three motorised Panzer Grenadier battalions drawn from the 1944 Panzer Grenadier Division. In this post I thought I would explore some options for the defend list.


In the Scenario Generation System the core list can be supplemented by either what is called an Option A list or an Option B list. In 1944 the Option A list can comprise 50 points while the Option B 100 points. Now, you would expect that a Defend List to be defensive in nature, however there are occasions when a commander will be forced to conduct limited attacks with these defensive forces and this is exactly what the Scenario System tries to capture. The situations, you may wish to use an option for are:
  1. Supplement your Defend List before being subjected to a Hasty Attack by an enemy. Refer 5.1.1.2 of the Scenario System.
  2. Supplement your Defend List before being subjected to a Deliberate attack by an enemy. Refer 5.1.2.2.
  3. Supplement your Defend List before being subjected to a Spoiling Attack by an enemy. Refer 5.1.3.2.
  4. Be required to conduct operations in a fluid operation situation. Refer 5.2
Given these tactical situations what would some useful reinforcements be? Remember you can have multiple option lists selecting one, or none, prior to the game. I will provide four sample lists to provide some ideas. 

Option A - List 1:

To break up an infantry attack in situations 1, 2 or 3 above additional artillery would be useful. Likewise additional artillery would be useful in a fluid operational situation. Of course in defensive situations some entrenchments can never be overlooked, especially if the enemy has a preponderance of artillery. Therefore, my first optional list is based on artillery drawn from the divisional structure:

Medium Artillery Battalion:
3 x 150/30mm Howitzers and truck @ 12 pts
1 x FAO @ 10pts

This consumes, assuming the guns are off-table and German regulars, a total of 48 points. This leaves only 2 points for some light entrenchments. The artillery are clearly an expensive option but the powerful 150mm guns could be useful in defence or in a a fluid situation. 

Option A - List 2:

An alternate Option A could provide some artillery and some additional AA. You may recall that I was concerned about the lack of effective AA systems in my last post. Therefore some Nebelwerfers, from an understrength formation, could form another useful Option A list. Now, before I'm asked the Werfers are not normally part of the divisional TO&E, however I typically allow a Werfer battalion to be considered a divisional asset. If you and your opponents agree then this could provide a useful option

Nebelwarfer Battalion:
2 x Nebelwarfer and truck @ 7pts each
1 x FAO @ 10pts

Divisional Light AA Battery:
2 Light AA Battery: Flakvierling (Quad 20mm) @ 9pts each

The total for the above is 48 points after application of the various modifiers. Therefore 2 points remain for some entrenchments. This small list is rather useful. While the Werfers can be somewhat irregular in their targeting they can also be very effective, especially against massed infantry in the open. Of course if you are expecting to face Allied aircraft the flak will be extremely useful.

Now one important point here is attachment limits. The Spearhead rules limit the attachments to a maximum of three companies per fighting battalion or the entire battalion. Assuming the Stug's are massed and attached to the weak Panzer-Grenadier battalion I can't allocate the above flak company and the Panzer Battalion flak company as it would exceed the three company limit. However, I can move the Panzer Battalion 20mm flak to another battalion, as it is a divisional support company, and allocate the Flakvierlings to support the Stugs.


Option A - List 3:

Another Option A list could provide some additional anti-tank capability. Very useful if you suspect your opponent will be using Churchill tanks!

Elements from Divisional AT Battalion:
1 x Towed Gun Company: 2 x Pak-43 88mm AT Guns & trucks @16pts each

After modification for German regulars the 88s come to 38 points, meaning 12 points remain. These can be used for light entrenchments for the infantry or you may want to consider providing some light entrenchments for the anti-tank guns in an effort to protect them from an artillery barrage which is very likely to be called in on their positions. However, I must add this option is of most use in situations 1, 2 or 3 above and far less so when under taking action in a fliud operational situation as mentioned in point 4 above. 

Option A - List 4:

Perhaps the final obvious Option A list is one with for counter-battery. Here is a sample Counter-battery list.
Medium Artillery Battalion:
3 x 150/30mm Howitzers and truck @ 12 pts
1 x Counter-battery observer @ 10pts

All these troops, including the counter-battery observer, are off-table and all are German regulars. As a result the total comes to 46 points. This leaves only 4 points for some light entrenchments. This is sufficient to entrench four stands of off-table artillery either the 150mm guns of the 105mm in the main list. Perhaps a useful option which may keep your own artillery operational.

I do hope this is useful and providing some ideas. The message I'm trying to get across is try and use the options to supplement your lists in areas the core list is short or that will directly counter your likely opponent. However, consider carefully how you would use each option depending on the tactical situation. In my next post I'll provide some suggestions around Option B lists. Stay tuned...

Wednesday, June 13, 2012

German Panzer Grenadiers 1944 (Part 1)

Submitted by TWR

I thought my first contribution to "Badly Lead Men" would be a review of one of my German 1944 lists. Being a relatively simple list I thought it would provide an interesting starting point for those considering building lists but perhaps not sure where or how to start. I'll tackle this little project in several parts, but for now I will focus on what I call the "core" troops.

The first thing that you will encounter when creating a German Late War Defend List is the fact there are never enough points to go around. This becomes especially apparent when you start placing troops on the table and you find yourself trying to cover five table objectives. So my first design rule for Germans is that you must consider a mobile defence. Trying to hold all the points is all but impossible, especially if you have armour. Not surprisingly I of course wanted to use armour. By that I don't mean those fancy tanks either, just good old Stug IIIs. With this in mind lets look at my first list, a German Defend List, based on a Panzer Grenadier Division in 1944.


The first component for me are the Panzer Grenadiers. My target was to have three battalions including some armour in the form of Stug IIIGs. This would allow two battalions to be positioned holding objectives and a third either holding ground or acting as a mobile reserve. Further, lets assume it is to operate on the Western front where the risk of all those massive Soviet heavy tanks won't be an issue. 

For those familiar with the Scenario Generation System the Core Troop budget for a defend list in 1944 is a mere 450 points, but worse, all Regular German troops have their actual cost multiplied by 1.2. You will find these multipliers outlined in section 10.2 of the Scenario Generation System.

Our first building block is therefore the standard German Motorised Panzer Grenadier battalion which comprises:
1 x Battalion HQ: Rifle stand @ 6pts
9 x Rifle stands @ 6pts each
1 x 120mm mortar and truck @ 6pts

Now, firstly the reader will note the lack of trucks for the infantry compared to the TO&E. In a defend list they are a complete waste of points and as their usage is voluntary they have been removed. With these changes the understrength battalion above adds up to a total 66pts. Assuming the troops are rated as German regular a 1.2 multiplier is applied. The result is an actual cost of 79 per battalion. As I'm having two battalions that's 158pts.

For reasons that will become apparent later I will also take a further infantry battalion, but in line with the under strength rules in the Scenario System, (7.2.1) I will have two weak companies each of 2 stands, along with a further company of three stands. Further, all support weapons have been removed; which is of course the mortar and anti-tank gun stands. Clearly this battalion has suffered heavy casualties recently. Anyway, the result is as follows:
1 x Battalion HQ: Rifle stand @ 6pts
7 x Rifle stands @ 6pts each

The total is 48 points, or 58 points when modified for German regulars.

On top of this we need a Regimental HQ. Now it is worth noting that there are only 11 stands in the first two battalions. To achieve the 13 stand battalion, and the 12" command radius, we need to add two more stand to each battalion. So for our purpose let's assume a Regimental HQ of:
1 x Regimental HQ: Rifle stand @ 6pts
1 x Recon Motorcycle SMG stand @ 6pts
1 x Regimental Anti-tank company: PAK40 & truck @ 11pts
1 x Regimental Anti-Aircraft Company: 20mm SP Flak (Sdkfz 10) @ 5pts   

The total here is 28 points, or once we apply the German regular multiplier, 34 points.

Now lets look at some armour. The armoured element for a Panzer Grenadier Division can be drawn from either the division's Panzer Battalion, some ten Stugs at full strength, or the Divisional Anti-Tank Battalion with six Stugs. As both are divisional assets they can be allocated out as support troops or used as a fighting battalion and cross-attached. For today's example let's assume two Stug companies drawn from the Panzer Battalion as follows:
1st Panzer Company: 3 x Stug IIIG L/48 @21pts each
2nd Panzer Company: 3 x Stug IIIG L/48 @21pts each

The panzer total is 126 points, but when multiplied by 1.2 we have consumed another 151pts. This can be allocated by company to two of the Panzer Grenadier battalions or massed and allocated to the third weak Panzer Grenadier battalion. There is some flexibility to be found here and I will cover this off in another post.


Back to the calculations. Currently we have consumed around 401 points of my 450 point budget. At this point we still have no artillery and little flak. Let's start to address this by adding in a 105mm towed artillery battalion. The organisation and cost for this are as follows:

Light Artillery Battalion:
3 x 105mm 105/28mm howitzers with trucks @ 10pts
1 x FAO @ 10pts

The cost for this is 40pts. This cost of on-table troops is modified for being German regular, the observer, but those stands off-table are reduced. The final cost is therefore 42 points. Adding this to our total we now have consumed 443 points and therefore we have only 7 points to play with.

Our flak options can find some divisional flak companies or in the Panzer Battalion itself. I'll opt for another 20mm Flak which is around 5 points. I would like more and better flak as the Panzer Grenadiers will be operating on the Western front, but alas I simply don't have the points.

Now you will have realised that some rounding has been going on. However, I run all my calculations through a spreadsheet and at this stage I have used 449 points, one short of a my 450 budget. Of some concern however is I have no entrenchments, or one if I use the remaining point. We could remove one of the infantry stands from the weak Panzer-Grenadier battalions making three two stand companies which would gains some additional entrenchments, or alternatively we could look at some options.

In future posts I will explain some ways of using the formation as well as how we can use various options to change the way we use the formation. In the meantime, good luck planning your own Spearhead list...